

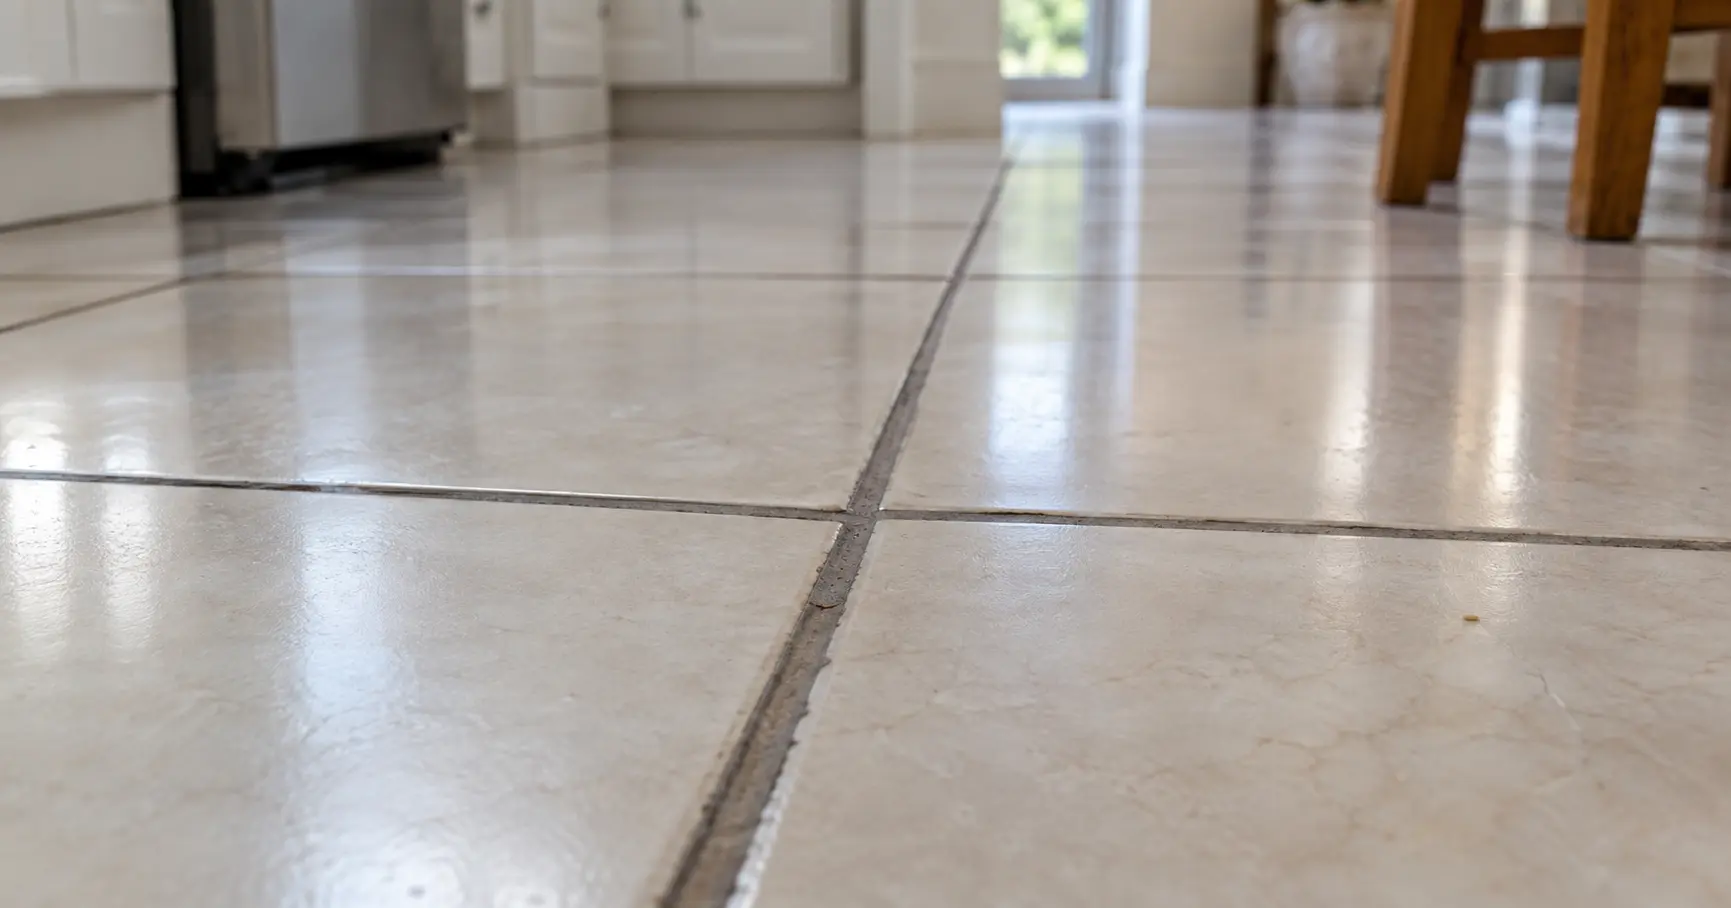
You mopped the whole floor. The tile looks fine. The grout lines still look gray, and you’re starting to wonder whether the only real answer is getting down on your knees with a toothbrush.
It isn’t. The method that works best barely involves your arms at all. You soak the grout in oxygen bleach, walk away for twenty minutes, and wipe it up. The soak does the work you were about to do by hand.
Here are four no-scrub methods, what each one actually fixes, and the popular tip that can quietly wear your grout down if you keep using it.
The short version
- Sweep or vacuum the floor first.
- Mix oxygen bleach powder into hot water, roughly 1 ounce per quart.
- Pour or sponge it along the grout lines.
- Leave it 15 to 30 minutes. Mist it if it starts to dry out.
- Wipe up with a damp microfiber cloth and rinse.
- Repeat on any line that’s still dark.
Why grout gets dirty, and why scrubbing makes it worse
Grout is mostly cement, sand and water. That mix dries hard, but it stays porous, which means it behaves less like a solid surface and more like a very dense sponge.
So when you spill oil, track in dirt, or run a mop over it, the mess doesn’t sit on top. It sinks in. That’s the reason mopping never fixes gray grout no matter how many times you go over it. You’re cleaning the tile and pushing dirty water into the lines.
Now the part most cleaning articles skip. Scrubbing hard is not a neutral act. Grout is softer than the tile around it, and pressing down with a stiff brush wears the surface away and opens the pores wider. Get aggressive with it often enough and the grout gets dirty faster every time, because you’ve given the dirt more room to settle into.
That’s why soaking beats scrubbing here. You’re not trying to lift dirt off a surface. You’re trying to get something down into the pores to loosen what’s already there.
First, find out if your grout is sealed
This takes thirty seconds and it changes which methods are safe for you.
Drip a few drops of plain water onto a grout line and watch. If the water beads up and sits there, your grout is sealed. If it soaks in and the line goes dark within a minute or two, it’s unsealed or the sealer has worn off.
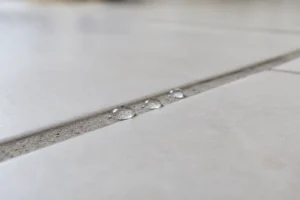
One tip that makes the test more honest: try it on grout that’s already slightly damp, like right after a shower. Bone dry grout can bead water for a moment through surface tension alone, even when the sealer is nearly gone.
Unsealed grout stains faster, absorbs whatever you put on it, and is more vulnerable to heat and acid. Keep that in mind as you read the methods below.
What actually works, side by side
| Method | Rough cost | Hands-off time | Best for | Won’t fix |
| Oxygen bleach soak | $8 to $15 a tub | 15 to 30 min | General gray, mildew, most floors | Grout that’s dyed through |
| Peroxide and baking soda paste | Under $5 | 10 to 15 min | Small areas, walls, spot stains | Large floors, heavy buildup |
| Steam | $60 to $200 to buy, $40 a day to rent | 0, but slow going | Sealed grout, mildew, no chemicals | Deep set-in stains |
| Spray-on grout cleaner | $10 to $20 | 5 to 10 min | Quick refresh, greasy kitchen grout | Badly neglected grout |
| Recoloring or regrouting | $30 DIY to $1,000+ pro | Varies | Grout past cleaning | Nothing, it’s the last resort |
If you only try one thing, make it the first row.
Method 1: The oxygen bleach soak
This is the one that actually delivers on the no-scrub promise, and it’s cheap.
Oxygen bleach is sodium percarbonate, which is washing soda and hydrogen peroxide combined into a powder. Drop it in water and it splits back apart, releasing peroxide that soaks into the grout’s pores and breaks down what’s trapped in there. OxiClean is the brand most people know, though a bag of plain sodium percarbonate from a hardware store does the same job without the added fragrance.
The important thing is that it works from the inside out rather than from the top down. That’s why it doesn’t need your arm.
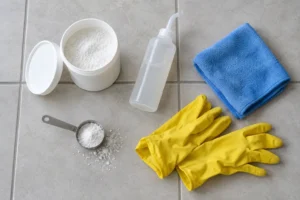
What you need
- Oxygen bleach powder
- Hot water, as hot as your tap runs
- A bucket or a squeeze bottle
- A microfiber cloth or flat mop
- Gloves
How to do it
Clear the floor first. Sweep or vacuum. Loose grit will just turn into mud and get dragged back into the lines.
Mix it hot. Use about 1 ounce of powder per quart of hot water, or 2 to 4 tablespoons per gallon. Heat matters more than people realize. Oxygen bleach works best around 104°F and up, and in the 120°F to 140°F range for stubborn stains. In cold water it releases oxygen so slowly that you’d need hours to get the same result.
Give it ten minutes to dissolve before you use it. Undissolved powder sitting on the tile does nothing.
Pour it along the grout lines. Enough to pool slightly in the lines rather than run everywhere. A squeeze bottle gives you far more control than a bucket.
Walk away for 15 to 30 minutes. This is where the cleaning happens. If the lines start drying out, mist them with water, because the reaction stops once the liquid is gone.
Wipe and rinse. Damp microfiber, then clean water. The water coming up should be noticeably brown. That’s the dirt that was inside the grout.
Repeat if needed. One pass handles normal buildup. Neglected grout often needs two.
One honest note on the wiping. On normal buildup a damp cloth is enough. On grout that’s been neglected for years you may need a light pass with a soft brush to finish the lines. That’s still a world away from scrubbing, and there’s a useful rule of thumb here: if it feels like you need to press hard, the soak needed more time rather than more muscle. Give it another fifteen minutes before reaching for force.
Wear gloves and open a window. Oxygen bleach is far gentler than chlorine bleach, but it’s still an oxidizer and it will dry out your hands.
Worth knowing
Mixed oxygen bleach stays active for about six hours, so there’s no point mixing a big batch the night before.
It’s gentler on colored grout than chlorine bleach because it doesn’t strip dye the same way, but test a hidden corner first anyway.
What it won’t fix: if the grout has been stained through for years, or if a previous owner used something acidic on it for a long time and leached the color out, no soak brings that back. Skip to the recoloring section.
What’s documented about this method
Nobody appears to have published a side-by-side test pitting oxygen bleach against the other methods here, so treat the amounts and dwell times above as the working range that manufacturers and cleaning guides agree on rather than a contest result.
One point that is well documented and worth understanding. Hunker recommends oxygen bleach and hot water for grout specifically instead of the vinegar route, and explains why chlorine bleach disappoints people on this job: chlorine bleach has high surface tension, so it can’t soak into a porous material the way peroxide does. It lightens the top layer and leaves the dirt sitting underneath. That’s the mechanism behind grout that looks great for a week after bleaching and then looks gray again.
Method 2: Hydrogen peroxide and baking soda paste
This is the DIY mix worth using, and it’s a different animal from the vinegar version everyone recommends.
Mix regular 3% hydrogen peroxide from the drugstore into baking soda until you get a paste about the thickness of toothpaste. Spread it along the grout with a gloved finger or an old spoon. Leave it ten to fifteen minutes, then wipe it off with a damp cloth.
The reason it works is the same reason the oxygen bleach soak works. Peroxide is the active ingredient in both. The baking soda is doing something simpler here, just giving the peroxide a body so it stays on the grout instead of running off.
That makes this the better choice for vertical surfaces. A paste will cling to a shower wall or a backsplash where a liquid soak would slide straight to the floor.
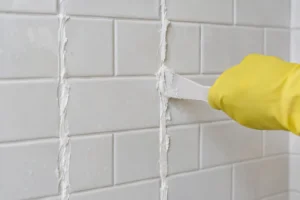
A few cautions. Peroxide can lighten colored grout, so test somewhere hidden. Don’t mix a batch and store it, because peroxide breaks down in light and a sealed container of it fizzing away is a bad idea. Mix what you need.
For a whole kitchen floor this gets tedious fast. Use it for spot work and walls, and use the soak for anything larger.
What a documented test found
Apartment Therapy ran this as an actual experiment. The writer taped off three sections of her bathroom floor and treated each one with a different homemade cleaner, then rated them.
Baking soda and hydrogen peroxide came out on top at 9 out of 10. She mixed one part peroxide to two parts baking soda, and described it as continuing to brighten the longer she worked at it. Plain baking soda and water came second at 7 out of 10, which left the grout cleaner but still pale gray.
Two caveats that matter. She scrubbed with a toothbrush throughout, so the test tells you which mixture works, not that it works hands-off. And she spent about four hours on three small squares before running out of steam, which is the strongest argument on this page for soaking instead of scrubbing. Same ingredient, far less of your afternoon.
Method 3: Steam
Steam is genuinely hands-off, uses no chemicals at all, and kills mildew. It’s also the method with the most misinformation around it, so here’s the honest version.
What steam does well
Hot vapor loosens surface grime and softens mildew so it wipes away. If you’re sensitive to cleaning chemicals, have pets underfoot, or just don’t want fumes in the house, it’s a real advantage. A steam mop with a narrow grout attachment lets you work the lines directly.
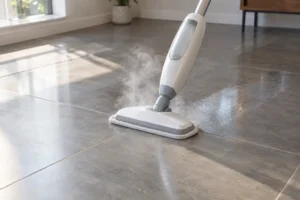
Use demineralized or distilled water in the tank. Tap water leaves mineral deposits that clog the machine over time, and Bissell recommends demineralized water for exactly that reason.
Where the risk actually is
The blanket claim that steam is always safe for grout is not right. Whether it’s safe depends on your grout.
Sealed grout in good condition handles steam fine. Unsealed grout is where problems start, because it absorbs moisture readily and the heat and pressure can work at a surface that’s already soft. Cleaning expert Sarah McAllister of GoCleanCo has made the point plainly: steam can damage grout, mainly when the grout is unsealed or when you’re using high-pressure steam. Her broader point is fair too, that almost any cleaning method can damage unsealed grout.
So do two things. Run the water drop test from earlier. Then test the steamer on a hidden patch and use the lowest pressure setting that gets results.
Also skip steam entirely on terracotta and most natural stone unless the manufacturer specifically clears it.
What it won’t do
Steam loosens what’s near the surface. It does not lift a stain that’s been sitting deep in the pores for five years. If your grout is gray rather than dirty, steam will disappoint you and the soak method won’t.
Buy or rent
A decent home steam mop runs roughly $60 to $200. Renting runs around $40 a day. If you have one tiled bathroom, rent or skip it. If you have tile through most of the house and plan to keep it up, buying pays for itself.
Method 4: A spray-on grout cleaner
Sometimes you want to buy the answer rather than mix it. Fair enough.
The products worth your money all work the same way: spray, let it dwell, wipe. The dwell time is the part people skip, and it’s the part that does the cleaning. Spraying and immediately wiping is just moving the dirt around.
There are two families of grout cleaner and picking the wrong one causes damage.
Alkaline cleaners handle organic mess, which means grease, food, body oils, soap scum. This is what you want for a kitchen floor. Most dedicated grout cleaners fall here.
Acidic cleaners handle mineral deposits, which means hard water rings and efflorescence, that chalky white bloom that comes up through grout. They’re effective and they’re also the ones that eat grout and etch stone if you overuse them.
pH-neutral cleaners are the safe default for natural stone. If you have marble, travertine, limestone or slate anywhere near the job, this is the only category you should reach for without checking the manufacturer first.
Brands people actually find on shelves in the US include Zep, Black Diamond, Grout-EEZ and Clorox’s tile and grout line. Read the label for the word your surface needs rather than buying on packaging.
One practical note. A cleaner that promises results in sixty seconds is usually either very aggressive or mostly optimism. The gentle ones need time, which is fine, because time is the thing you have plenty of while it sits there.
If you want one name rather than a category: after running their homemade cleaner test, Apartment Therapy’s editors noted that when they’d rather buy something premade, they reach for Zep’s grout cleaner and brightener. It’s stocked at Home Depot and easy to find.
What about vinegar and baking soda?
This is the most repeated grout tip on the internet, and it deserves a straight answer rather than another repeat.
The fizzing is mostly theater
Vinegar is an acid. Baking soda is a base. Put them together and they neutralize each other, producing carbon dioxide, water, and a small amount of sodium acetate. That’s the bubbling everyone finds so satisfying.
The problem is that once the fizzing stops, you’re left with something close to salty water. The vinegar has spent itself on the baking soda instead of on your grout. Any cleaning you get is mostly from the mechanical action of the paste and from whatever scrubbing you end up doing anyway, which defeats the whole point.
If you want the two ingredients to work, use them separately, not mixed.
What happened when someone actually tested it
Apartment Therapy put this to the test properly. Three taped-off sections of a bathroom floor, a different homemade cleaner on each, and a rating for every one.
Vinegar mixed one to one with warm water finished last at 3 out of 10. The writer went in with high expectations, scrubbed, let the mixture sit, scrubbed some more, and reported that almost nothing happened. The brush lifted loose particles and the grout came up marginally cleaner, but she described the whole thing as an hour on the floor with little to show for it.
Keep in mind she was working it with a toothbrush the entire time. Vinegar underperformed even with far more effort than any method on this page asks of you.
What the grout makers say
This is where it gets more serious than a failed kitchen experiment.
Mapei, one of the largest grout manufacturers in the world, addresses this directly. Their position is that occasional use of vinegar on porcelain or ceramic tile with cement-based grout should not cause damage, but that frequent or regular use can discolor and weaken the grout, and that it should not be used for routine maintenance.
So it isn’t that vinegar destroys grout on contact. It’s that the advice to reach for it every week is quietly wearing down the thing you’re trying to clean. Acid attacks the cement binder in grout over time, and on colored grout it can leach the pigment out, which is part of why so many people find their grout going pale and chalky after years of vinegar.
Natural stone is a hard no
On marble, travertine and limestone, vinegar etches the stone itself, not just the grout. That damage is permanent and shows up as dull patches you cannot polish out at home. If you’re not certain what your tile is, don’t risk it.
The verdict
Occasionally, on sealed ceramic or porcelain, vinegar is fine. As your regular grout routine, no. On natural stone, never.
The oxygen bleach soak does the same job better, costs about the same, and doesn’t come with a countdown on how many times you can use it.
What to never use on grout
Short list, and the first one matters more than the rest put together.
Never mix bleach with vinegar, ammonia, or any acidic cleaner. This produces chlorine gas. It is genuinely dangerous in a small bathroom with the door shut, and people end up in emergency rooms over it every year. If you’ve used one product and want to try another, rinse the surface thoroughly with water first and open a window.
Steel wool and scouring pads. They cut into the grout and leave scratches that hold dirt better than the original surface did.
Melamine foam erasers. The Magic Eraser type. They feel gentle but they work by micro-abrasion, which is sandpaper at a very fine scale. On grout that means you’re slowly sanding away the surface. Fine for a one-off mark, bad as a routine.
Chlorine bleach on colored grout. It strips the pigment, and once that’s gone it isn’t coming back. Apartment Therapy’s cleaning coverage goes further and advises against bleach on grout generally, noting that it can leave behind a film that attracts dirt and can weaken the bond between the grout and the tile. There’s a second problem too: chlorine bleach has high surface tension, so it sits on top of porous grout instead of soaking in. It lightens the top layer and leaves the dirt underneath, which is why grout cleaned with bleach often looks great for a week and then looks gray again. Toilet bowl cleaner is worth avoiding for the same reason, since most of it is bleach-based.
Acidic cleaners on natural stone. Covered above, but worth repeating because the damage is permanent.
Anything you haven’t spot tested. Pick a corner behind a door or under an appliance, try it there, wait for it to dry, then commit.
Room by room
The method stays the same. What changes is what you’re up against.
Kitchen floor
The enemy here is grease, which is why so many kitchen floors resist cleaners that work everywhere else. Go alkaline. The oxygen bleach soak handles this well because the washing soda half of it is a degreaser. Give the strip in front of the stove and the sink a second pass, because that’s where the cooking oil lands.
Grease doesn’t stop at the floor either. If the whole room is due a refresh, the same film is sitting on your kitchen cabinet doors, and they’re worth wiping down while the grout sits.
Bathroom floor
Usually mildew and hard water rather than grease. The soak works, and the peroxide in it deals with the mildew at the same time. If you see chalky white deposits rather than dark ones, that’s mineral buildup and it needs a different product.
Shower walls and floor
Soap scum sits on top of the grout, so you have to get through that layer before anything reaches the grout itself. Use the paste rather than the liquid soak, since a liquid just runs down a vertical wall. Shower grout also needs this more often than anywhere else in the house, because it never fully dries out.
Backsplash and wall tile
Same vertical problem, same solution. Paste, not liquid. Lay a towel along the countertop first.
Entryway
Ground-in dirt from shoes, pressed into the grout by foot traffic. This is the area most likely to need two rounds of soaking. A doormat inside and outside does more for this floor than any cleaner will.
If kneeling is a problem
You don’t have to get on the floor for any of this. A squeeze bottle with an angled tip lets you apply the solution standing up. A flat microfiber mop wipes it away. The soak does the part your hands and knees would otherwise be doing, which is the main reason this method is worth knowing if getting down on a hard floor is difficult or painful.
Stains that need a different fix
Some problems look like dirty grout and aren’t. Cleaning harder won’t touch these.
White grout going yellow
Usually one of three things. Soap residue building up in layers, which the oxygen bleach soak handles. Hard water minerals, which need an acidic cleaner used carefully and once. Or the sealer itself yellowing with age, in which case no cleaner helps and the grout needs stripping and resealing.
Black spots that come back
If dark spots return within days of cleaning, that’s mold growing inside the grout rather than dirt sitting on it. Oxygen bleach reaches further into the pores than chlorine bleach does, so it’s the better tool here, but the real fix is the moisture. Run the exhaust fan longer, leave the shower door open, and deal with any leak behind the wall.
Chalky white haze on newer tile
If your tile was installed recently and has a cloudy film across it, that’s grout haze, left over from the flooring installation itself rather than from anything you did. It is not dirt and no amount of cleaning solution will shift it. You need a grout haze remover, often sulfamic acid based. Mapei makes one, and most tile suppliers stock a version. Follow the directions on the bottle exactly, because these are strong products.
When the grout is past cleaning
Sometimes the honest answer is that the grout isn’t dirty. It’s stained through, or worn down, or somebody sealed it while it was still dirty and locked everything in. You’ll know because a full soak makes almost no difference.
Two options at that point. Recoloring or color sealing puts a pigmented coating over the grout and gives you a uniform color. It’s affordable, it works, and it’s DIY-able for a small area with a grout pen, which makes it one of the cheaper home upgrades that genuinely changes how a room reads. Regrouting means cutting the old grout out and replacing it, which is more work and more money but is the right call if the grout is cracked or crumbling rather than just ugly.
If grout is missing, crumbling, or you can see gaps down to the substrate, stop cleaning and fix it. Water getting behind tile is a far more expensive problem than gray grout lines.
How to keep it clean
The soak is a reset. Staying ahead of it is easier than doing it again, and grout belongs on the same routine property maintenance list as gutter clearing and HVAC filters rather than in the pile of things you deal with once they’re bad.
Seal it
This is the single highest-value thing you can do, and most people skip it. Sealer fills the pores so dirt sits on the surface where a mop can actually reach it.
Wait until the grout is completely dry after cleaning, at least 24 hours. Apply with a small brush or applicator bottle along the lines, wipe excess off the tile after about ten minutes, and let it cure.
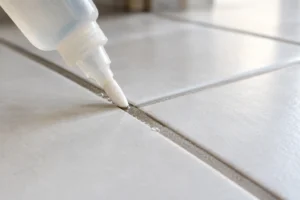
Mapei’s guidance is to reapply once a year, or whenever you notice water is no longer beading up. That second half is the better rule, since a shower floor and a spare bathroom wear at completely different rates. Run the water drop test every six months in high-use areas and let the result decide rather than the calendar.
One exception: epoxy grout is not porous and does not need sealing at all.
Mop like it matters
Change your mop water when it turns gray. Mopping with dirty water is how clean grout goes gray again in a month, because you’re depositing a thin film of dirt into every line.
Use a pH-neutral cleaner for routine mopping. Save the strong stuff for the occasional deep clean.
How often
It depends more on the room than most people expect. A dry hallway with low traffic might genuinely only need a deep clean once or twice a year. A shower, where grout never fully dries out, may need attention monthly. Kitchen floors sit somewhere in between.
Wipe spills when they happen rather than when you notice them. Grout absorbs what sits on it, and thirty seconds at the time saves a soak later.
When it’s worth calling a pro
A professional has one thing you can’t buy at the hardware store: hot water extraction at high pressure. The machine forces heated water into the grout and vacuums it straight back out, which pulls up embedded dirt that soaking loosens but can’t remove.
What it costs in 2026
Angi puts the national average for professional tile and grout cleaning at $480, based on thousands of completed projects, with most homeowners paying somewhere between $285 and $676. Priced by area, that’s roughly $0.50 to $3 per square foot depending on tile size, how bad the grout is, and what material you have.
Most companies charge a minimum of $100 to $200 to make a small job worth the trip. If you want sealing done at the same time, budget extra.
The honest math
For one small bathroom, hiring out rarely makes sense. The minimum call-out fee alone costs more than a tub of oxygen bleach and an afternoon.
It starts making sense when you have tile through most of the house, when the kitchen grout is greasy enough that home methods are losing, when you have natural stone and don’t want to risk the wrong product, or when you want it cleaned and sealed properly in one visit. That last one matters, because sealer applied over half-clean grout locks the stains in permanently.
Get three quotes. Prices for this work vary more than you’d expect between companies in the same city.
Common questions
Can you really clean grout without scrubbing?
Mostly, yes. Oxygen bleach dissolved in hot water and left on the grout for 15 to 30 minutes does the lifting, and on normal buildup a damp cloth finishes the job. Badly neglected grout may still need a light pass with a soft brush, which is nothing like scrubbing it clean by hand. What no-scrub methods can’t fix is grout that’s stained through or physically worn.
How long should the cleaner sit on the grout?
Fifteen to thirty minutes for oxygen bleach, longer for heavy stains. Keep it damp the whole time, because the reaction stops once it dries. If it feels like you need to scrub hard afterward, it usually just needed more time.
Does steam damage grout?
Not on sealed grout in good condition. The risk is with unsealed grout, which absorbs moisture readily, and with high-pressure settings. Run the water drop test first, then test the steamer on a hidden spot at the lowest pressure that works.
Can I use bleach on colored grout?
No. Chlorine bleach strips the pigment and it doesn’t come back. It also sits on the surface rather than soaking into the pores, so it lightens the top layer while leaving the dirt underneath. Oxygen bleach is the better choice on any colored grout.
How often should grout be sealed?
Mapei recommends reapplying once a year, or whenever water stops beading up on the grout. Check with the water drop test every six months in kitchens, bathrooms and showers. Epoxy grout doesn’t need sealing at all.
Why is my grout still dirty after cleaning?
Usually one of three reasons. The cleaner didn’t sit long enough, the grout is unsealed and stained deep into the pores, or it isn’t dirt at all but worn or discolored grout that needs recoloring.
Do grout pens actually work?
For covering stained grout, yes, and they look good for a year or two. They’re a cosmetic fix rather than a cleaning one. One catch worth knowing: a grout pen won’t bond properly to recently sealed grout, so use the water drop test before you buy one.
How much does professional grout cleaning cost?
Around $480 on average in the US in 2026, with most projects landing between $285 and $676. That’s about $0.50 to $3 per square foot, and most companies have a $100 to $200 minimum.
Where to start
If you’re looking at gray grout right now, buy a tub of oxygen bleach, run the water as hot as it comes, and give one small section the twenty minute soak before committing to the whole floor. Half an hour later you’ll know whether your grout is dirty or stained through, and that answer decides everything else.
Then seal it. That’s the step that keeps you from doing this again next spring.